How do you upgrade to Windows 11?
Update to Windows 11 in 4 steps
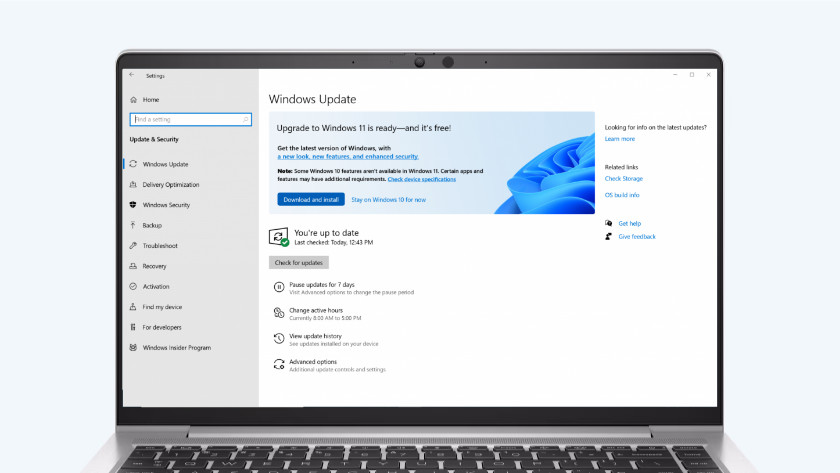
Windows 11 is the latest version of the Windows operating system. You can easily perform the Windows 11 update. You can update your laptop or desktop via 4 steps:
- Check the system requirements.
- Make a backup of your files (optional).
- Open the settings and search for Windows updates.
- Install the Windows 11 update.
Step 1: check the system requirements
It's important that your laptop or desktop meets the system requirements for Windows 11. You can easily check if your laptop or desktop meets the system requirements via the Microsoft PC Health Check app. You can also check this via the settings under Privacy & security. The system requirements are:
- At least an 8th generation Intel or 2000 series AMD Ryzen processor with at least 1GHz speed and 2 processor cores.
- 4GB RAM and 64GB storage.
- A video card compatible with DirectX 12 or higher.
- A TPM 2.0 chip and UEFI system firmware.
Step 2 (optional): make a backup of your files
Do you want to save your files before you update your laptop or desktop to Windows 11? First make a backup of your files. You can do so easily via the cloud or an external hard drive. You can use OneDrive for example, Microsoft's cloud service. That way, you can quickly retrieve your files after you updated your laptop.
Step 3: open the settings and look for updates
-
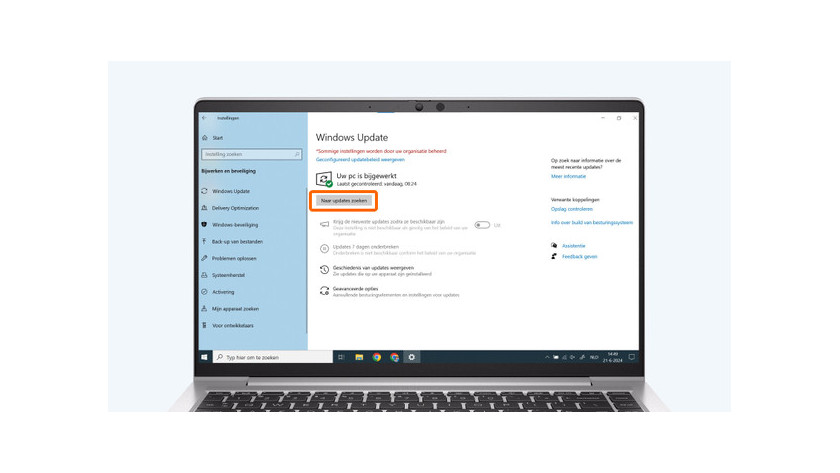
Go to Windows Update and click on 'Check for updates'.
Is your laptop or desktop ready for the update? Look for the Windows 11 update via the settings.
- At the bottom left of your screen, click on the Windows logo.
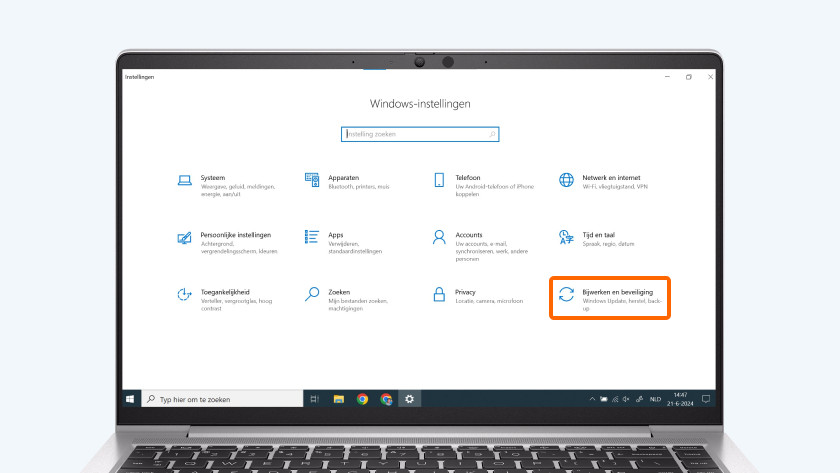
- Click on the gearwheel icon of the Settings or look for Settings via the search bar.
- Select Update & security.
- Under Windows Update, go to Check for updates.
- If Windows 11 is available, it'll appear here. Click on * Download and install*. The Windows 11 download starts now.
Step 4: install Windows 11
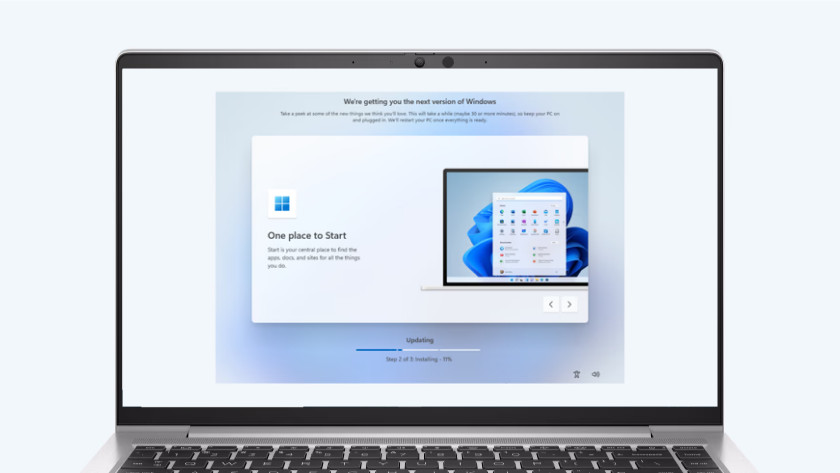
Your PC will install Windows 11. During the installation, your laptop or desktop with restart multiple times. Keep your laptop connected to the charger.
- After a couple of minutes, the Windows 11 installation window will appear.
- Follow the steps of the Windows installation window.
- Choose the right keyboard layout for you. NL/QWERTY: The United States, BE/AZERTY: France, QWERTZ: Germany.
- Connect to the WiFi network.
- Log in to your Microsoft account.
- Go through the final steps of the installation and get started with Windows 11.


