
How do you solve a blue screen on your Legion T7?
Adjust Lenovo Vantage settings
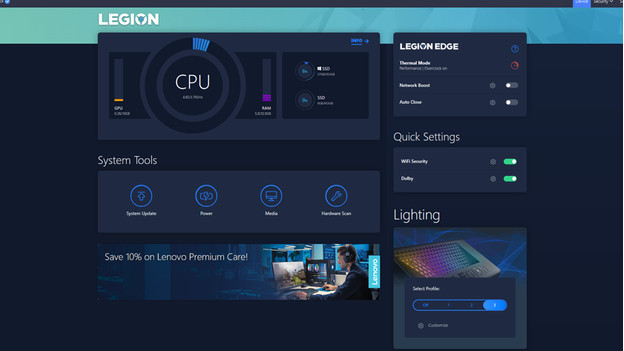
Go through the following steps to ensure your Lenovo Legion T7 desktop won't crash anymore:
- Step 1: download the updates via Lenovo Vantage
- Step 2: adjust the Thermal Mode
- Step 3: adjust the overclock ratio
- Step 4: close the Vantage and save your edits
- Step 5: restart the desktop
Step 1: download the latest updates
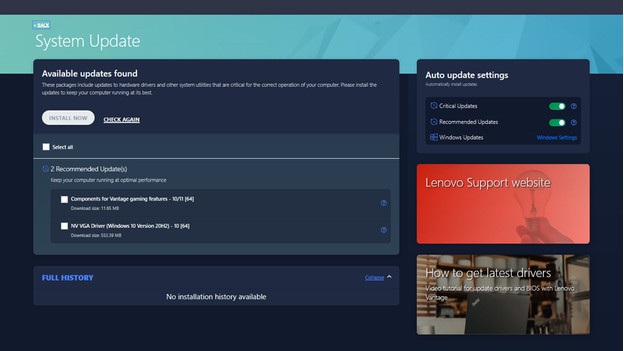
The first and easiest way to download and install the Lenovo Vantage update is via Vantage itself. Go from System Tools to System Update. Here, you can find available updates. Select all updates and click Install Now. After restarting, your desktop should work properly again. If there aren't any available updates for you (yet) in this screen, you can manually adjust a couple of settings. In this article, you can read how to do this.
Step 2: adjust the Thermal Mode
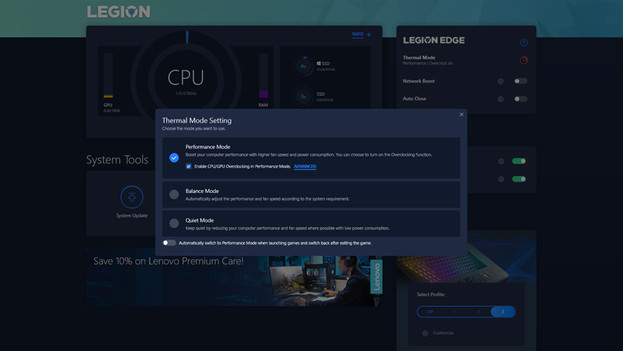
On the home screen, click Thermal Mode. A new window will open. In this window, adjust the Balance Mode to Performance Mode. Then, click Advanced to adjust the settings more precisely. A new window called Overclock Advanced Settings will open.
Step 3: adjust the overclock ratio
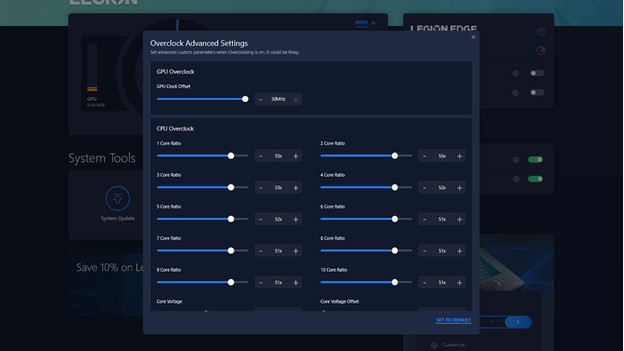
In this new window, adjust all sliders from 52x to 51x. Also set the GPU Clock Offset to 30MHz. Double check if you did this correctly before you continue to the next step.
Step 4: close Lenovo Vantage and save edits
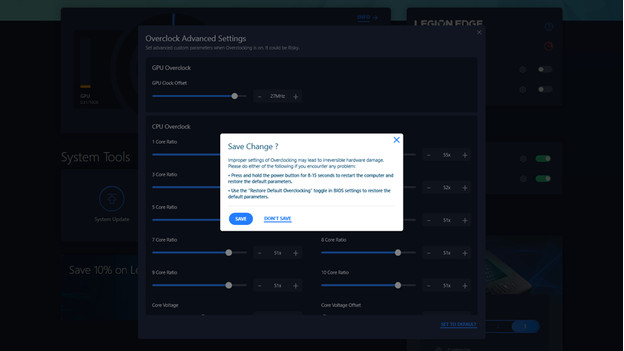
If you've adjusted everything correctly, close the Overclock Advanced Settings window. A pop-up will appear asking you if you want to save your edits. Click Save to make the adjustments. You now have the correct settings to avoid possible blue screens and crashes.
Step 5: restart the PC
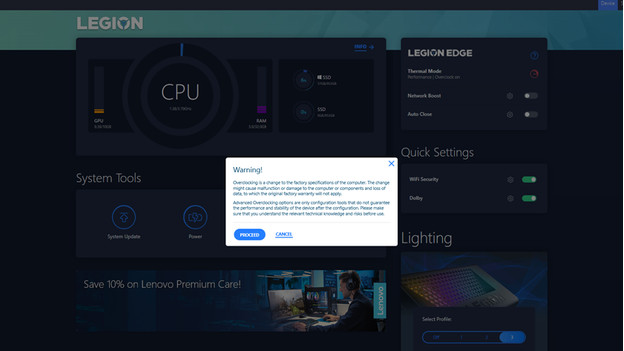
The last thing you do is restart your Legion T7 desktop. Always do this, just to be sure. After restarting, your PC should work properly and you're ready to continue gaming.


