How do you install your QNAP NAS?
Set up QNAP NAS in 6 steps
You can set up your QNAP NAS quite quickly. Follow these 6 steps to set up your new QNAP NAS:
- Step 1. Place the drives in your NAS
- Step 2. Connect your NAS to the network
- Step 3. Install the operating system
- Step 4. Create a storage pool
- Step 5. Create a volume
- Step 6. Create a shared folder
Step 1: place the drives in your NAS
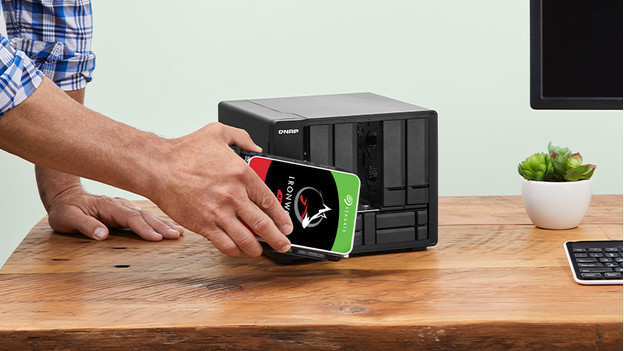
Place the drives in the NAS before you turn it on. Open the slots on the front of your QNAP NAS. Pull the holder out and take the side panels off. You use these to keep the drive in place. Place your hard drive in the holder, re-attach the panels, and place the drive in the NAS. This is the case for 3.5-inch drives. Do you have a 2.5-inch HDD? Screw it down in the indicated places. Repeat this step if you have more than 1 drive. After that, plug in the rest of the cables and turn the NAS on.
Step 2: connect your NAS to the network
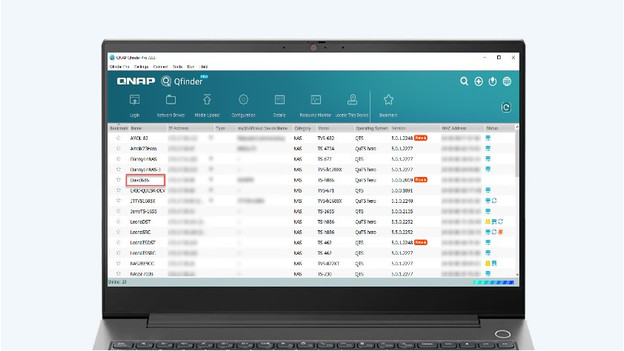
Connect your NAS to the network via the Ethernet cable. Download QFinder Pro on your computer and connect it to the same network as the one you want to connect your NAS to. Open de app, search for your NAS, and double-click the name. Your NAS is now connected to the network and has also been found in the Qfinder app. In the next step, you'll install the operating system.
Step 3: install the operating system
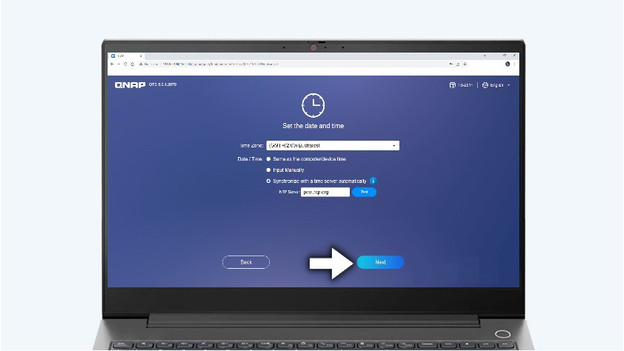
After selecting the name of your NAS, you'll automatically open the operating system installation. Accept the warranty conditions and select 'Next'. Choose your operating system and fill out your usernames. You do this for your NAS and your own account. The name of your NAS should be between 1 and 14 characters, and your username between 1 and 32 characters. Choose a password of up to 64 characters and select 'Next'. Set up the time and date, after which the NAS will automatically install the firmware and operating system. Don't turn the NAS off during the installation. This'll take a few minutes.
Step 4: create a storage pool
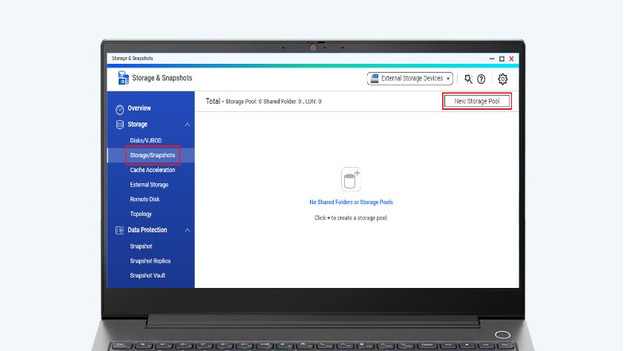
After the installation, you log in with your username and password. Go to 'Storage' and select 'Storage/Snapshots'. Select the option 'Create Storage Pool' at the top right. The installation will now open with extra options, like 'Enable Qtier'. With this, you can automatically optimize the best setup. But you can't turn this option back off again. Select 'Next' and select a RAID setup depending on how many drives you have in your NAS. Go through the next steps and select 'OK'. After the storage pool, you can create a volume so you can use that as well.
Step 5: create a volume
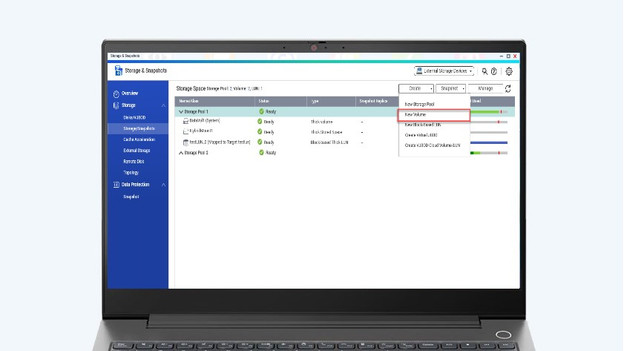
Go back to 'Storage/Snapshots', select 'Create', and choose 'New Volume'. Here, you select 'Thin Volume'. This setting allocates storage space to your documents as they are written to your drive. If you have multiple storage pools, you can also create extra volumes and switch storage locations. Select 'Next' and name your volume. You can then allocate a capacity and continue with the optional settings. Select 'Finish' and you're done with the installation. We'll explain how to create a shared folder in the last step.
Step 6: create a shared folder
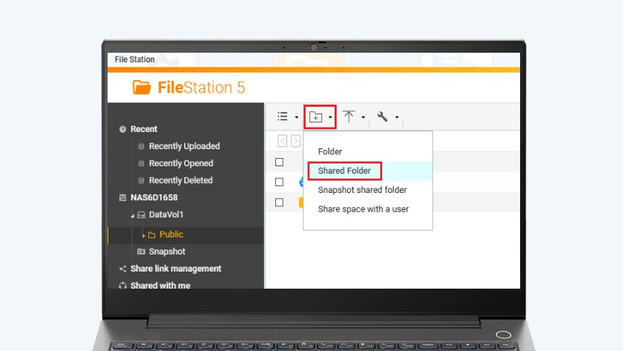
With a shared folder, you have a central place where all users of the NAS share and use documents. Open the File Station or go to the control panel of your QNAP NAS, select 'Privilege', and then select 'Shared Folders'. Select the folder with the plus in it and go to 'Shared Folder'. Name the folder and allocate the volume at which the folder should be made. Then configure the access privileges for users and click 'Finish'. Your NAS will now create a shared folder for all appointed users. Your QNAP NAS is now ready for use.