How do you transfer drives from your old Synology NAS?
Transfer your hard drives in 6 steps

We're happy to help you make it easier to move your hard drives. We'll help you on your way with the following steps:
- Check the compatibility of your drives.
- Make a backup of your settings.
- Make a backup of your data via Hyper backup.
- Move your hard drives.
- Install your hard drives.
- Set up the new NAS.
You'll need:
- Your current and new (set up) Synology NAS.
- A laptop or desktop.
- A (modem)router your NAS, IP camera, and computer are connected to.
- Your internal hard drives, with an extra temporary hard drive.
Step 1: check the compatibility of your drives
Before you place the hard drives in a new Synology NAS, you have to check if they're compatible. The same goes for an M.2 SSD you use as cache memory.
-
Do you want to place the drives in a new NAS that's exactly the same? Go to step 2.
-
Do you want to place the drives in a new NAS that's different? Check the compatibility list on the website of Synology. Most Seagate IronWolf or WD Red drives work together with Synology NAS after 2015. Do you have an HDD with more than 8TB capacity? Check if your drive fits in a NAS of after 2021.
Step 2: make a backup of your settings
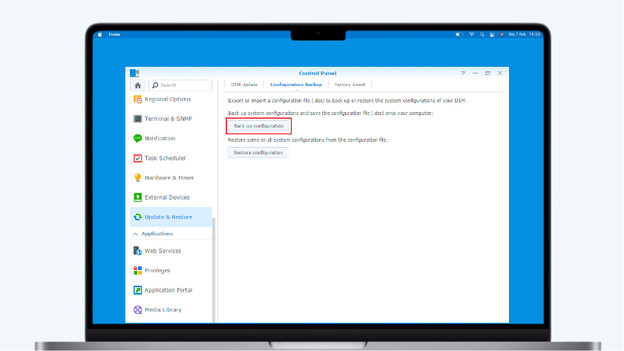
Sign in on your old NAS and go to the configuration screen. Click on Update and restore. Make sure your NAS has the latest version of DSM. Isn't this the case? Synology will let you know in this window. After the update, go back to this window and click on the tab 'Configuration backup'. You'll see 2 options, 'Backup' and 'Restore'. Click on 'Backup' and save all the settings that you used on your old NAS. Tip: use a temporary drive for this, instead of one of your main hard drives.
Step 3: make a backup of your data
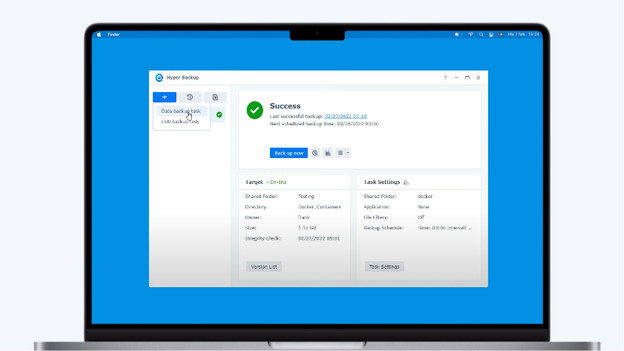
Data doesn't get lost when you move your hard drives, but a backup is always useful. Download the Hyper Backup app in the Synology Store and get started. Click on the plus in the left menu and choose 'Data backup task'. Select 'External NAS device' as destination and enter the server name or the IP address of your new NAS. You can find this via find.synology.com. Select the folders and apps you want to backup and click 'Complete'. Hyper Backup will get started. Done with the backup? Turn off both NAS systems.
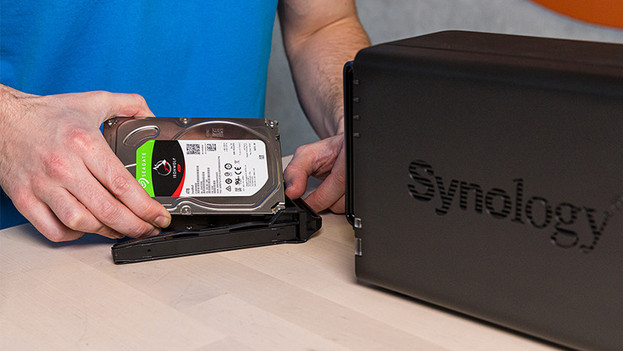
Step 4: transfer your hard drives
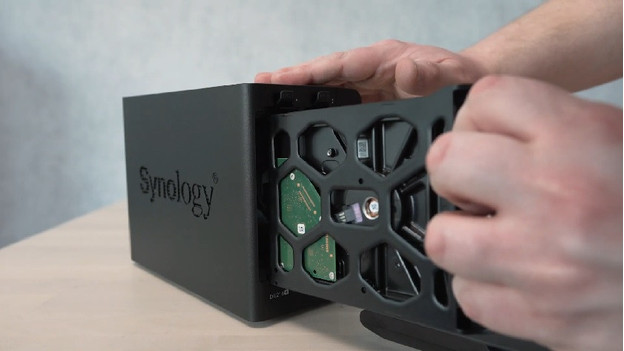
When both of your NAS systems are turned off completely, you can remove them from your old NAS. Write down the order in which you've installed the drives, because your new NAS will use the same volumes and ports. Insert the drives into the new NAS and turn them on again. It's now time to set up your NAS.
Step 5: install the hard drives
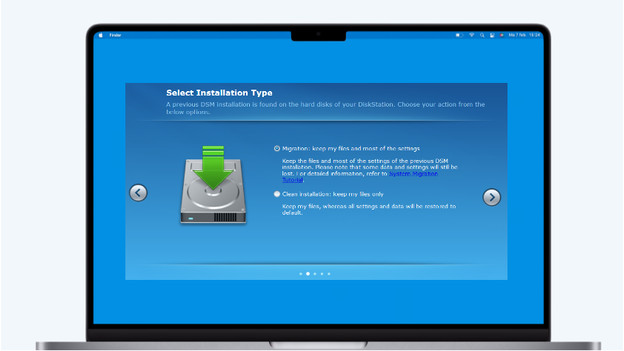
Is your new NAS on? Open an internet browser on your computer and go to find.synology.com. Double-click your new NAS and check whether the status of your new NAS is 'Migratable'. Click on 'Install' and choose 'Migrate' with the installation method. Do you get the warning 'All data on the hard drive(s) will be deleted'? Close the browser and turn off your NAS. Check if you've placed the drives the same way as in your old NAS and continue the installation.
Step 6: set up your NAS
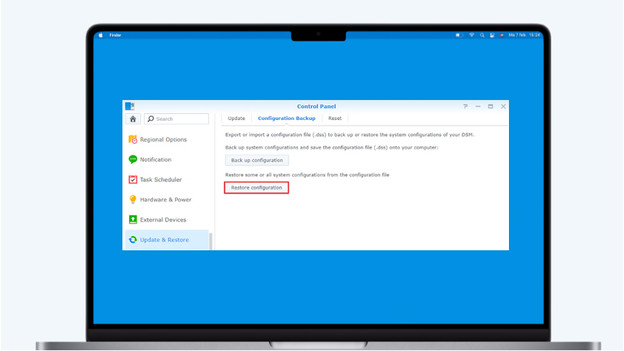
The last step is to set up the NAS and restore your old settings. During the set up, choose the latest version of DSM software. Sign in on your new NAS and go to 'Update and restore' in the configuration screen. Click on 'Restore configuration' and use the previously saved settings of your old NAS. Your new NAS is now ready for use with your old drives.
How do you replace the drives with a broken NAS?
In case of a broken or defect Synology NAS, you can only move the hard drives to the exact same model. You need an extra temporary hard drive for this that you use to install the new NAS. Insert it to the NAS, go to find.synology.com, and install the same DSM version as on your old NAS. Turn off the NAS, insert your old drives into the new system in the same order, and sign in again. Your NAS drives are ready for use again.
Questions
How do I migrate my SSD cache to a new NAS?
My NAS only has 1 slot, can I move this drive to a model with multiple slots?
Is it possible to move drives to a NAS that's less strong?