How do you restore Windows via a system restore point?
You can return the Windows system to an earlier version via a system restore point. This way, you can return the system to the moment you made restore point. That's useful when your PC isn't working well after installing an app, for example. In this article, we'll explain how to restore Windows using a system restore point in 2 steps.
Get started with the system restore point

You can easily make a restore point in Windows. Restoring doesn't affect your personal files. You do delete all updates you've installed after making a system restore point.
- Step 1: go to the control panel
- Step 2: start the recovery process
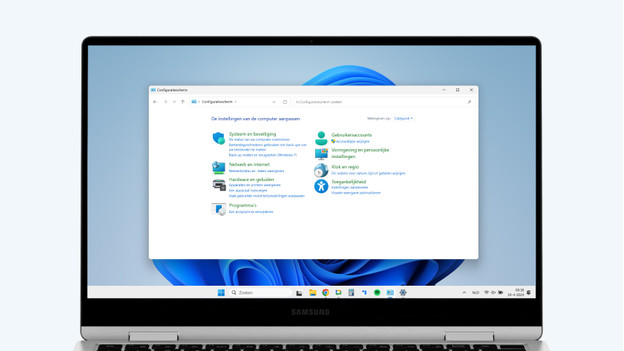
Step 1: go to the control panel

- Search for the 'Control Panel' via the start menu.
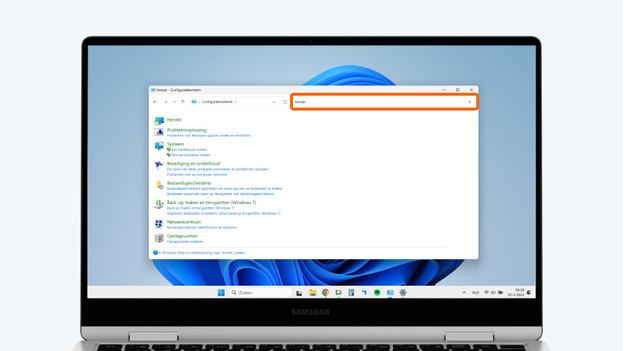
- Go to 'Recovery' via the search bar.
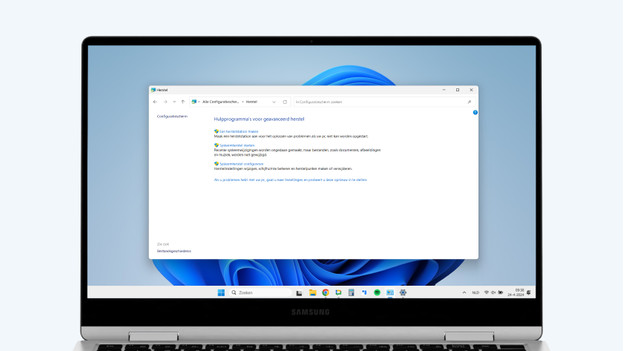
- Do you want to create a new system restore point? Select 'Create a recovery drive'.
- Do you want to recover a system restore point? Select 'Open System Restore'.
Step 2: choose a restore point

After selecting 'Open System Restore', you'll see a list of different system restore points.
- Choose the restore point you wan to recover.
- Select 'Next' and then 'Finish'.
- Your PC will return to a system restore point.
There's no system restore point

Don't you see a system restore point? That means the system recovery isn't turned on.
- Go to the control panel and search 'Recovery'.
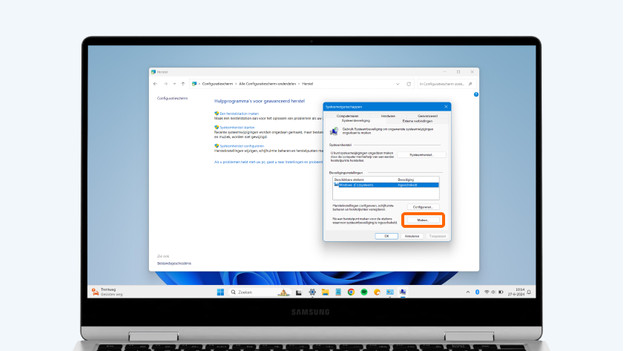
- Select 'Configure System Restore'.
- Make sure 'Turn on system protection' is on in this window. Is it off? Turn it on. Select 'Apply' and then 'OK' to do this.
- The PC will now create a system restore point.

Article by:
Deanne
Laptop Expert.

