7 tips on how to use AI in Adobe Premiere Pro
Get started with AI in Adobe Premiere Pro
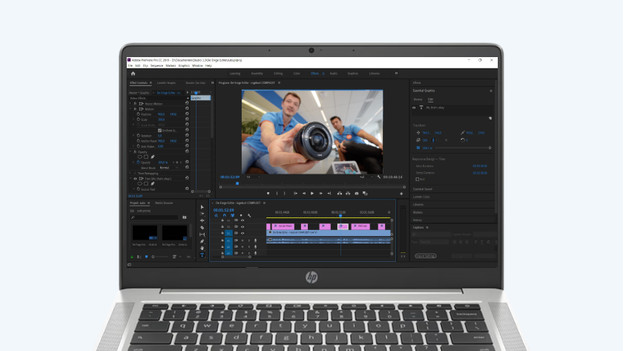
In Adobe Premiere Pro, you can take your video editing to the next level with the Adobe Firefly AI technologies:
- Tip 1: extend videos and ambient audio
- Tip 2: adjust objects and backgrounds
- Tip 3: create transcripts and translate captions
- Tip 4: edit the audio and soundtrack
- Tip 5: edit scene transitions
- Tip 6: edit colors and contrasts
- Tip 7: adjust the aspect ratio
Tip 1: extend audio and video clips
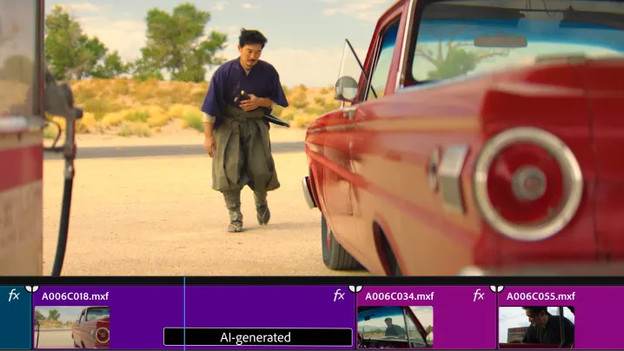
With Generative Extend, you can easily extend footage and audio. Sometimes, the footage you recorded isn't long enough or you want to keep the sounds in the background a bit longer.
- Choose the clip you want to extend. Video clips have to be at least 2 seconds and audio clips at least 3 seconds.
- Select the Generative Extend tool.
- Click and drag the beginning or end of the clip to the desired length. You can extend video clips with up to 2 seconds and audio clips with up to 10 seconds.
- The AI generated frame are labeled as AI generated.
- Not completely happy with the result? Right-click on the label and choose Regenerate.
Tip 2: adjust objects and backgrounds

With Generative Fill, you can easily remove objects like lamp stands, license plates, and microphones from your footage. You can also adjust landscapes or replace objects.
- Use a selection tool and select the area of the video where you want to use Generative Fill.
- In the text box that appears, you can write a description of what you want to generate or you can keep it empty and leave it to the AI.
- Click on Generate and view the various images AI designs for you.
Tip 3: create transcripts and translate captions
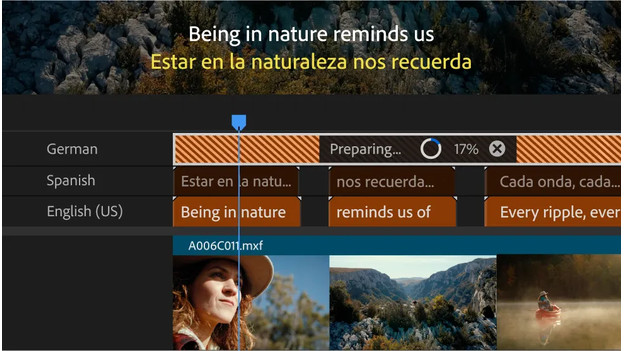
With Speech to Text, you can easily translate transcripts and add captions to your videos in various languages.
- Select Window and click on Workspaces.
- Click on Captions and Graphics.
- Double-click the clips you want to generate a transcript or caption for.
- Click on Transcribe.
- Want to edit some transcripts? Double-click the text you want to edit.
Tip 4: edit the audio and soundtrack
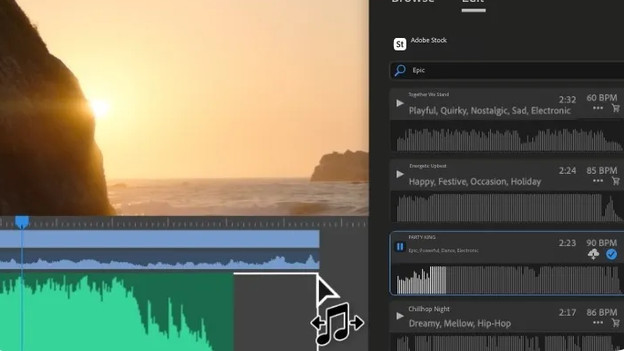
Via the Essential Sounds panel, you can easily adjust audio with AI. Remove background noise and sync your footage to the soundtrack. With the Enhance speech function, you can remove background noise in conversations.
- Click on Window and then on Effects.
- Choose 1 or multiple clips and double-click Audio Effects.
- For noise reduction, click Reduce Noise and then DeNoise.
- Want to sync the clips with the soundtrack? Drag the music to the length of your clip via the timeline, the AI will extend the music to the desired duration.
Tip 5: edit scene transitions
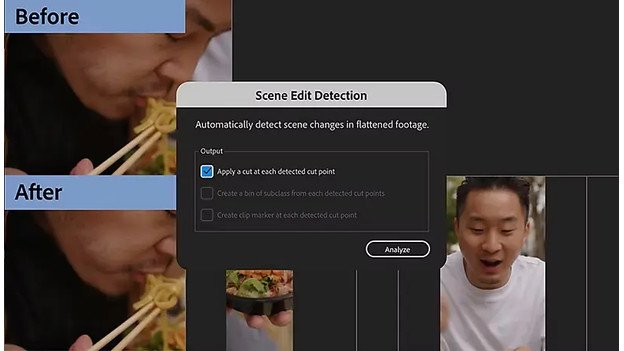
With Scene Edit Detection, you can create transitions between clips more easily and faster. That way, you don't spend as much time on splitting short clips.
- Right-click a clip in the timeline.
- Select Scene Edit Detection.
- Choose if you want to add transitions, place clip markers at the cut points, or make a new folder for sub-clips.
- AI makes the transitions between clips even smoother.
Tip 6: edit colors and contrast
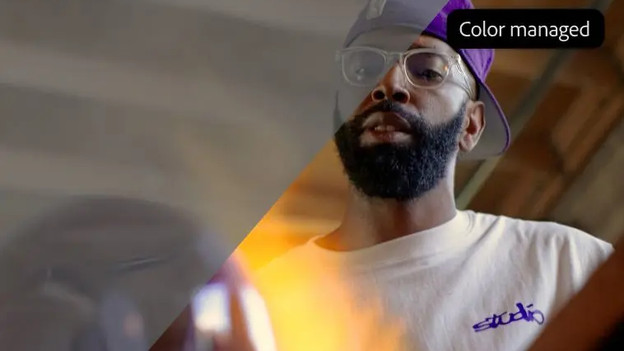
Add color corrections with Auto Color or match them with Color Match. This allows you to remove the color differences, so the colors of different clips look the same.
- Open Window and click on Lumetri.
- Click on Auto Color and let AI add color corrections.
- Click on Color Match to adjust the colors of all your videos.
Tip 7: adjust the aspect ratio
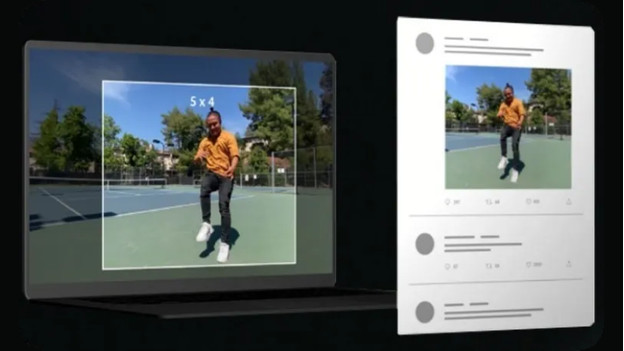
Via Auto Reframe, you can easily adjust the aspect ratio of your clips. Many videos are recorded in the default horizontal 16:9 aspect ratio. Social media platforms often work with the vertical 9:16 aspect ratio.
- Via the program monitor, click on Auto Reframe.
- Navigate to Effects and then to Video.
- Click on Transform and drag the Auto Reframe function to your timeline.
View all Adobe Premiere Pro packs