
How do you install a 2.5-inch SSD in a laptop?
What do you need?
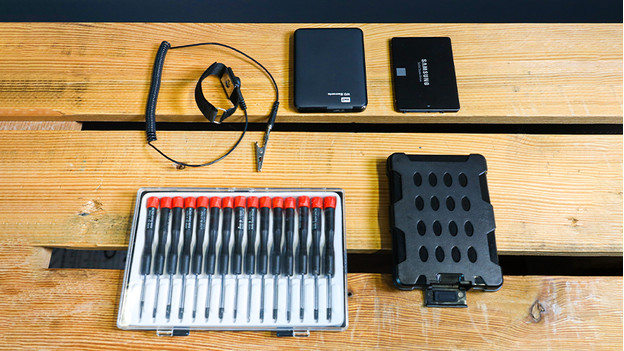
Before you begin, check if your laptop supports a 2.5-inch SSD and whether you can replace the SDD. Consult the manual or the manufacturer's website. All set? Make sure you have the following supplies:
- Laptop
- 2.5-inch SSD
- A small cross-head and/or slotted screwdriver
- SATA/USB adapter or SSD enclosure
- External hard drive or cloud storage
- Antistatic wrist strap
Replace the SSD in 8 steps
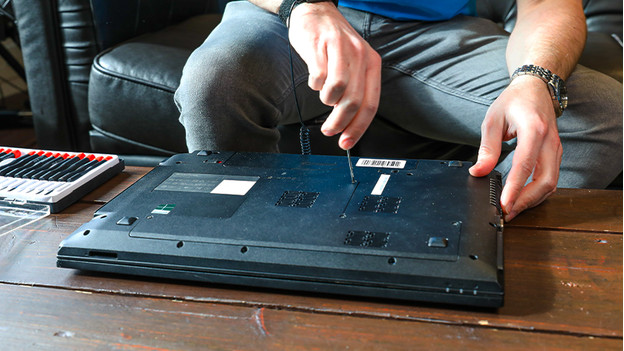
You can easily replace an old drive with a new SSD. Follow the 8 steps below:
- Back up your files to an external drive
- Install cloning software on your laptop
- Transfer your data from your old to your new SSD
- Initialize your new SSD
- Clone your data
- Remove your old HDD/DD from your laptop
- Place your new SSD into your laptop
- Boot your laptop and check the SSD
Step 1: back up your files to an external drive
- Connect an external hard drive or SSD to your laptop.
- At the bottom left of your screen, click the Windows icon (or the search bar next to it) and search Control Panel.
- In the Control Panel, go to System and Security and select the option Save backup copies of your files with File History.
- Select the external hard drive you want to save your files to and begin backup.
- Put the drive aside.
Step 2: install the cloning software

Before you install the new SSD, you have to transfer your operating system (and possibly your data). Otherwise, your laptop won't start. This is also called migrating or cloning and requires you to use cloning software. This kind of software is often included with the SSD, but you can also download it. A program that's often used is Macrium Reflect. This works with any SSD, regardless of brand. Download and install the program accordingly.
Cloning alternative: clean install of Windows
Do you prefer a clean version of Windows? In that case, you won't need any cloning software. Note: You'll lose all your files. Want to clone anyway? Go to step 3.
- Look up the Windows serial number. You can find it on the back of your laptop or on the packaging of your Windows product.
- Go the the Microsoft website.
- Make sure you have a USB flash drive with at least 4GB storage space available. Download Windows and store it on the drive.
- Did it work? Skip the next steps and go to step 6.
Step 3: transfer your data from your old to your new SSD
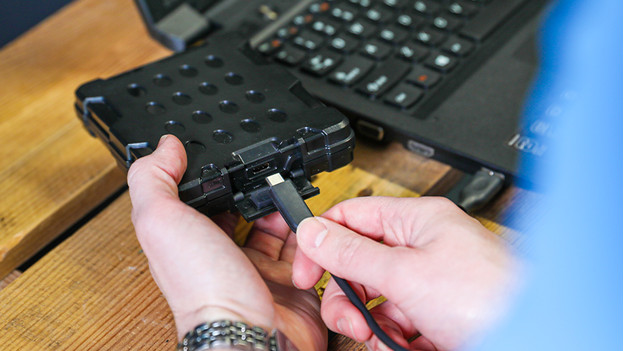
Connect your new SSD to your laptop. There are 2 ways to do this:
- Connect a SATA/USB adapter to your new SSD.
- Or place the new SSD in an SSD enclosure.
Plug the USB cable of your adapter or enclosure into your laptop's USB port(s) to establish a connection. Install the SSD with the next step, or else Windows won't recognize it.
Step 4: initialize your new SSD
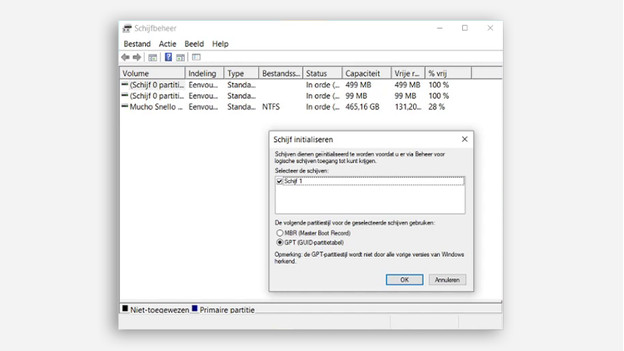
- At the bottom left of your screen, locate the Windows icon.
- Right-click this icon and open Disc Management.
- Several bars appear with various blocks. No pop-up window? Click the drive that's not initialized on the right side of the screen.
- Select the option New Simple Volume and follow the remaining steps.
This allows your laptop to recognize the new SSD when you've installed it.
Note: keep in mind the storage capacity of your new SSD
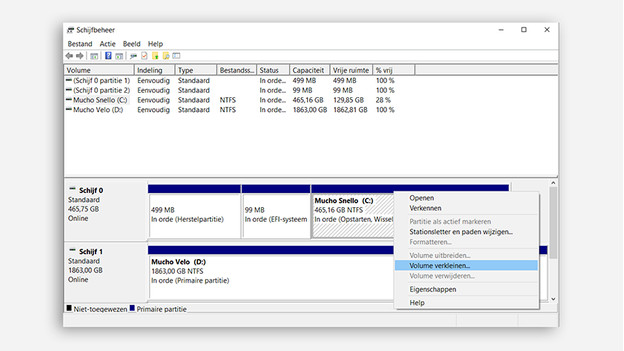
Does your SSD have less storage capacity than your old storage module? Remove some files from your old drive. If you're not comfortable doing this, there's an alternative:
- Reopen Disk Management.
- Right-click the Primary Partition.
- Select Shrink Volume. This way, you won't lose any important files as you shrink the partition.
Step 5: clone your data
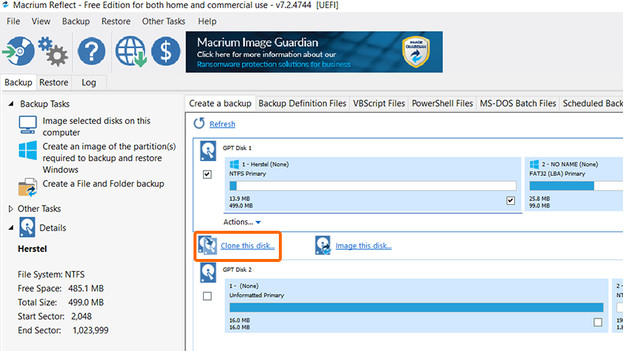
- Go to the cloning software and select the files you want to transfer.
- Select your new SSD as the destination drive.
- Note: the transfer may take a couple of hours. Don't disconnect the storage module until everything is transferred. Go to the next step.
Step 6: remove the old hard drive or SSD
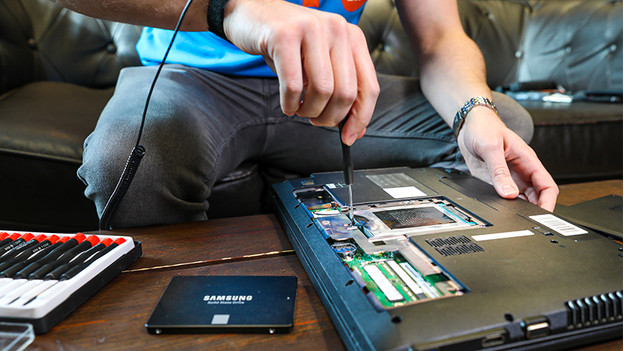
Remove the current storage module from your laptop.
- Unplug the charger and put it aside.
- Shut down your laptop completely. Don't put it in sleep mode.
- Find a clean and well-lit surface. Place your laptop in upside-down position.
- Wrap the antistatic wrist strap around your wrist and attach the crocodile clip to a grounded object, like your radiator.
- Unscrew the back-screws to open the laptop. Remove the battery to prevent damage.
- Locate the old drive, carefully unscrew it, and take it out of its holder at a 30-degree angle.
Step 7: add your new SSD
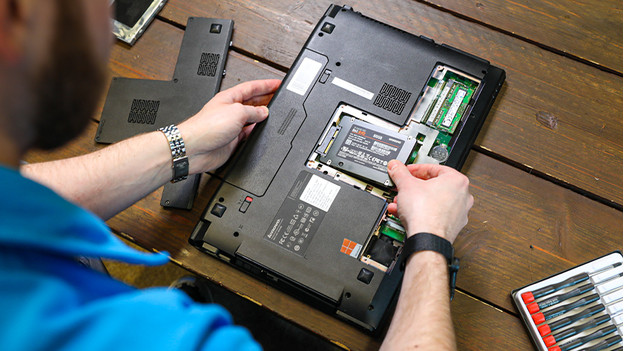
Install your new SSD in the slot that's now available.
- Carefully slide it onto the SATA connector. The SSD only fits in one position and needs little force.
- If you feel a lot of resistance, check if your laptop really supports an SSD just to be on the safe side.
- Re-insert the battery. Screw the laptop's underside back into place.
- Plug the laptop's charger into a socket and boot your laptop.
Step 8: boot your laptop and check the SSD
If all went well, your laptop should recognize your SSD, operating system, and data right away, and you'll be able to pick up where you left off. Run a final check.
- In Windows (shortcut: Win+S), search for "defrag...".
- Select Defragment and Optimize Drives.
- Is your SSD listed as a solid-state drive? That means everything went well.
Alternative: perform clean install of Windows
Did you choose a clean install, instead of cloning software?
- Insert the USB flash drive with Windows on it into your laptop's USB port.
- Once you've booted the laptop on F12, follow the steps and select Only install Windows.
- Select your new SSD to install Windows, and the installation will begin.
Tip: reuse your old hard drive
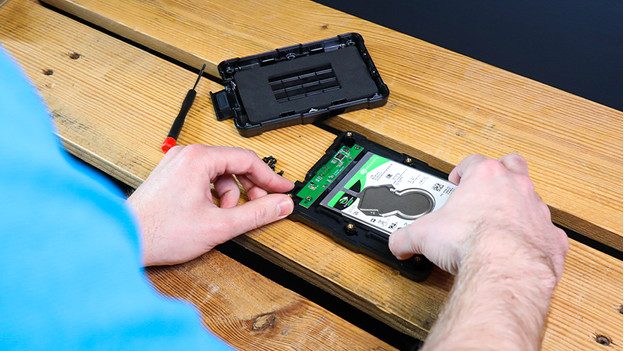
If the hard drive or SSD that you replaced still functions properly, you can put it in a hard drive or SSD enclosure. That way, you can turn an internal drive into an external drive. Choose a 2.5-inch hard drive enclosure to be sure you have the right one.


