How do you mount a wall-mounted range hood?
You need:
To mount a range hood, you need a ruler, pencil, impact drill, plugs, and an extra pair of hands. On this page, you can read how to mount a range hood step by step.
Step 1: Draw the center line on the wall
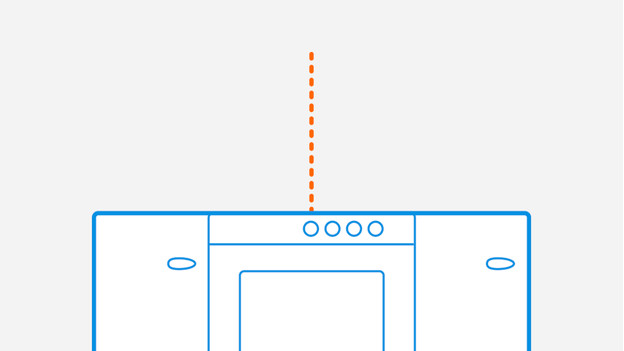
Draw the center line using a ruler (preferably with a spirit level) to place the range hood right above the center of the cooktop. This is a vertical line you draw on the wall. The center line indicates the center of the cooktop. You can determine the center by measuring the width of your cooktop and dividing it by 2. By drawing the center line, you can place the range hood right above the center of your cooktop.
Step 2: mark where you need to drill
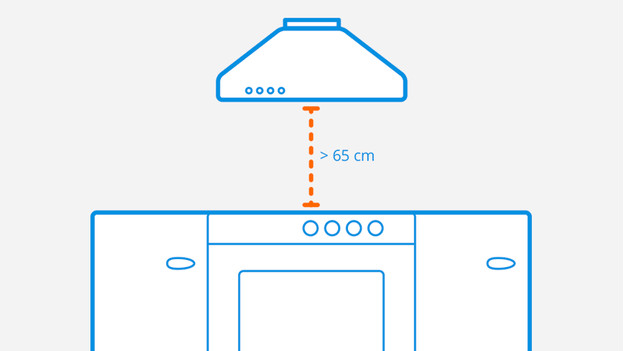
Unbox the range hood after you've drawn the center line. You should install the range hood at least 65cm above the cooktop. On the inside of the range hood, you'll find holes you can use to mount the range hood with screws. Position the range hood as you like and use a pencil to mark the place you'll need to drill. To determine where you want to place the range hood, you can use the center line and a spirit level to place the range hood straight and in the center. The shaft of the range hood isn't just attached to the range hood itself, but also to a mount on the ceiling. Press this mount to the ceiling and mark the drill holes.
Step 3A: Check your wall
Before you start drilling, you must first check that there are no pipes on the spot where you want to drill. To find out, use a pipe finder. Then you go to the next step.
3B: Drill the holes
In the enclosed manual of your cooker hood you can read how big and deep the holes must be that you drill. This depends on the screws you use to attach the hood and the shaft holder to the wall. Depending on the material of the wall, you need a specific drill. Which you need and how you use it best, you can read in the article below.
Step 4: install the range hood
Insert a plug to all the holes you just drilled and tighten the screw for the most part. Mount the range hood on the wall with the screws and tighten them firmly.
Step 5: mount the drain pipe

With most hoods, you have to place a flange on the top of the hood so that you can connect the drain pipe. A flange is a plastic ring that comes with the hood when it is needed for installation. If this isn't the case with your cooker hood, fit the drain hose directly onto the cooker hood. The outlet pipe is fixed on both sides with the help of a hose clamp.
Step 6: mount the chimney
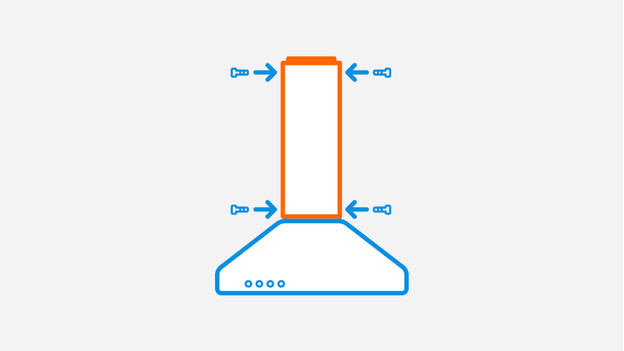
Secure the chimney to the top of the range hood and the mount to the ceiling with the included screws.