How do you set up the Robomow robot lawn mower?
Set up you robot lawn mower in 5 steps

You set up a Robomow robot lawn mower in 5 basic steps. There are several differences in the setup process among the different series, namely the RC, RS, and RX series. That's why it's smart to have a look at the setup videos on this page and read the installation manual before you start setting up the robot lawn mower.
Step 1: make preparations.
Step 2: place the base station.
Step 3: place the perimeter wire.
Step 4: set up the base station.
Step 5: prepare the robot lawn mower for use and test the robot lawn mower.
Step 1: prepare

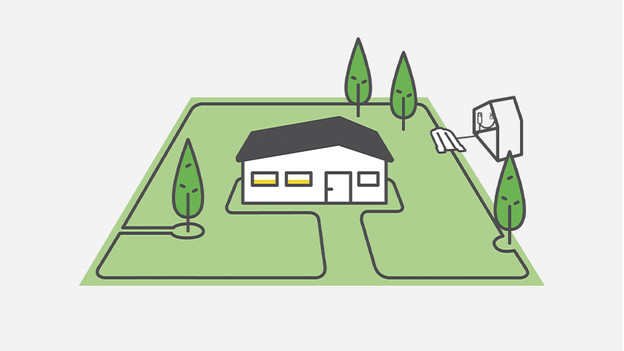
Sketch out your garden and lawn first, so you know the exact layout of your garden. This allows you to better estimate the amount of perimeter wire you need. Obstacles with a width of at least 10 and a minimal height of 15 centimeters such as trees don't need to be marked off separately with perimeter wire. You do need to block off soft obstacles like flower beds. Also make sure the lawn is free of toys, rocks, branches, and other (metal) obstacles.
In addition, you need a hammer, a small flat screwdriver, and combination pliers to lay out the perimeter wire.
Step 2: place the base station

When you place the base station, keep in mind these 4 guidelines:
-
Check the manual of your model to see what distance you should keep to the socket.
-
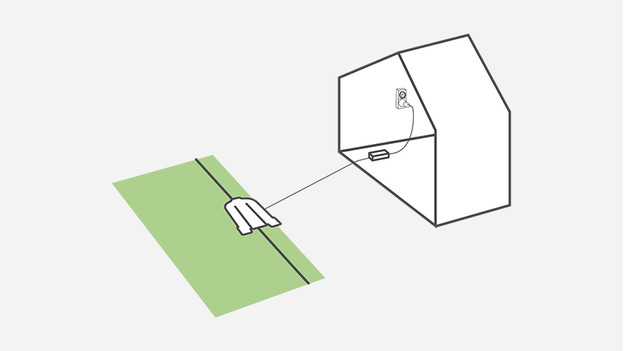
Make sure you leave a straight stretch of ground of at least 3 meters in front of the part of the base station that the robot lawn mower drives over.
-
Make sure the lawn around the base station is level and even and that the base station is installed in the shade.
-
Do you have sprinklers? Place the base station at least 1 meter away from the sprinkler.
Step 3: place the perimeter wire

Mow your lawn one last time with your old lawn mower before you lay out the perimeter wire. This sounds strange, since that's why you bought a robot lawn mower in the first place. But this helps you secure the wire pegs properly and keeps the lawn mower from cutting through the wire.
Draw about 30 centimeters of wire through the hole of the base station, secure the first pin, and unroll the wire counterclockwise. After, you secure the wire with the wire pegs every few meters. Corners don't have to be set off at a right angle, but rather make corners as round and smooth as possible (about 45 degrees). The included Roboruler is a handy tool that helps you measure the distance to the edges and passages. In addition, you should read the manual closely to determine the distance to things like downhill slopes or bodies of water.
Have you finished laying out the wire? Connect the 2 ends of the wire to each other at the base station and secure the 2 wires with 1 wire peg. Make sure you connect the 2 wires properly and neatly. The manual illustrates exactly how to do this.
Step 4: set up the base station

To set up the base station, you have to further connect the perimeter wire and the extension cords. In addition, you have to connect the extension cord to the power supply. The manual tells you how to do this step by step. These are a couple of tips when it comes to choosing the location of the power supply:
- Find a place near a socket for the power supply.
- Don't place the power supply with the laid-out perimeter wire on the lawn.
- Choose a dry and covered location.
You'll know everything is set up properly when the LED light on the base station starts to blink green (if the robot lawn mower isn't on the base station) or remains green without interruptions (if the robot lawn mower is on the base station).
Step 5: prepare the robot lawn mower for use and test the lawn mower

The base station is ready, now let's prepare the robot lawn mower. Every type of robot lawn mower is set up differently. After the setup, you can perform the first test. Have a look at the manual of the product to see how do this.


